
Who can resist the allure of a perfectly baked brownie? It's a timeless dessert that brings joy to both young and old. Whether you're a baking novice or a seasoned pro, crafting irresistible brownies at home is simpler than you might think. This guide will walk you through each step to ensure your homemade brownies come out perfectly every time.
The foundation of any great brownie is high-quality ingredients. You'll need unsalted butter, sugar, eggs, vanilla extract, all-purpose flour, unsweetened cocoa powder, baking powder, salt, and of course, good-quality chocolate. Opting for high-quality chocolate can truly elevate your brownies from good to sensational.
Start by preheating your oven to 175°C (350°F). Properly preheating your oven ensures your brownies will bake evenly. While the oven is warming up, generously grease a square baking tin with butter and line it with parchment paper, allowing some extra paper to hang over the sides. This makes removing the brownies later a breeze.
Next, create a double boiler by placing a heatproof bowl over a simmering pot of water. Add your butter and chocolate to the bowl, stirring occasionally until both have melted smoothly. This gentle heating method prevents the chocolate from burning, a crucial step for achieving that luscious texture.
Once the butter and chocolate have melted, remove the bowl from the heat and allow it to cool slightly. This prevents your eggs from scrambling when added. In a separate large mixing bowl, combine the sugar, eggs, and vanilla extract. Whisk these together until the mixture becomes thick and pale, a process that typically takes about two to three minutes.
Slowly pour the slightly cooled chocolate-butter mixture into the egg-sugar mixture, stirring continuously to create a smooth, glossy batter. At this stage, your kitchen will begin filling with the rich aroma that promises delicious results ahead.
In another bowl, sift together your dry ingredients: flour, cocoa powder, baking powder, and a pinch of salt. Sifting helps eliminate any lumps and incorporates air, ensuring a lighter final product. Gradually fold these dry ingredients into your wet mixture using a spatula. Be careful not to overmix; doing so can result in tough brownies. Instead, use gentle, sweeping motions until just combined.
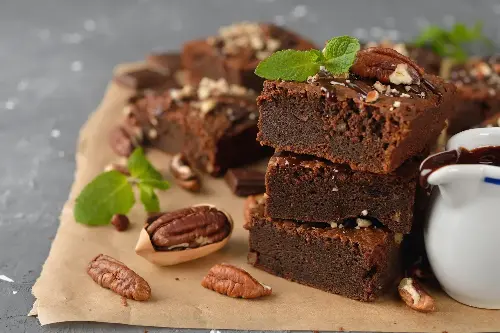
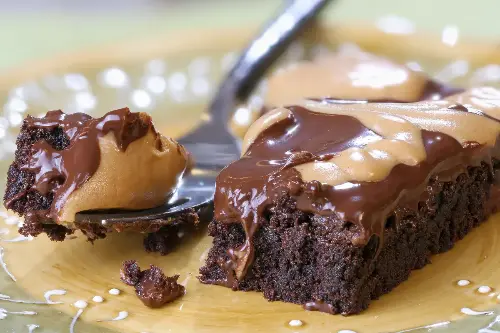
Now, here's where you can get creative. Brownies are wonderfully versatile; you can add nuts for a crunch, chunks of chocolate for a gooey surprise, or even a swirl of caramel or peanut butter. Simply fold in your chosen add-ins at this point.
Pour your completed batter into the prepared baking tin, spreading it evenly with a spatula. Give the tin a gentle tap on the counter to release any trapped air bubbles. Place the tin into your preheated oven and set the timer for 20–25 minutes. Baking times can vary depending on your oven and the thickness of your brownies, so begin checking them around the 20-minute mark.
To determine whether your brownies are done, insert a toothpick into the center. If it comes out with a few moist crumbs clinging to it, they’re ready. You want to avoid baking them until the toothpick is completely clean, as this typically means the brownies have gone too far and will be dry.
Once out of the oven, allow the brownies to cool in the pan for about 10 minutes. This short cooling period helps them set, making the next step easier. Using the overhanging parchment paper, lift the brownies out of the pan and transfer them to a wire rack to cool completely.
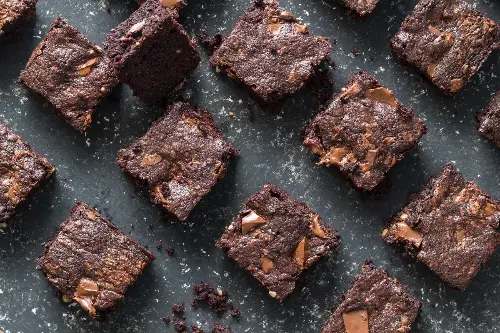
While waiting for the brownies to cool can be a test of patience, it’s crucial. Cutting them while they’re still warm can lead to crumbling and messy pieces. Once cooled, use a sharp knife to cut your brownies into squares. For a cleaner cut, you can occasionally clean the blade with warm water.
Your homemade brownies are finally ready to be enjoyed. Whether you prefer them on their own, with a dusting of powdered sugar, or even a scoop of vanilla ice cream, these brownies are sure to delight.
Baking brownies at home can be a therapeutic and rewarding experience. The process is straightforward, yet allows room for creativity, making it perfect for anyone looking to enjoy a classic treat. By following this step-by-step guide, you’re well on your way to becoming a brownie-making aficionado. Happy baking!